Step 1: The account manager (you) invites new users
1. Log in to your Amazon Seller Central account.
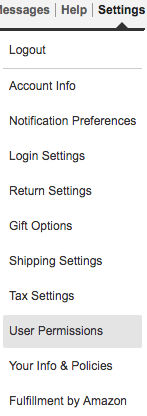
2. Hover over the Settings menu in the upper right-hand corner of your dashboard, and click User Permissions.
3. Under Add a New Seller Central User enter Accountingprose as the Name.
4. Under Email Address enter nameofyourbusiness@accountingprose.com
5. Click the Send Invitation button.

Step 2: Accountingprose accepts the invitation
1. Accountingprose will receive an email to accept and create a user account for your Amazon Seller Central.
2. We will accept and create the account.
3. We will notify you that we have accepted the invite and it is time for you to edit our user account permissions.
Step 3: Edit the user account
1. Under Settings click User Permissions.
2. Click the Manage Permissions button next to the account you want to change.
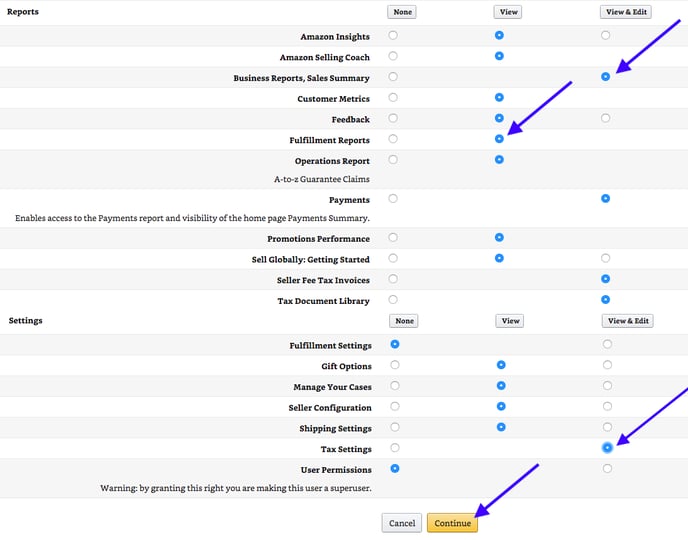
3. Click the button next to each tool you want to allow the user to access. We will need access to sales information and tax reports shown below:
4. Don't forget to click Continue to save the settings. You'll see a green checkmark and confirmation.
5. Let us know that we are good to go! Thanks!